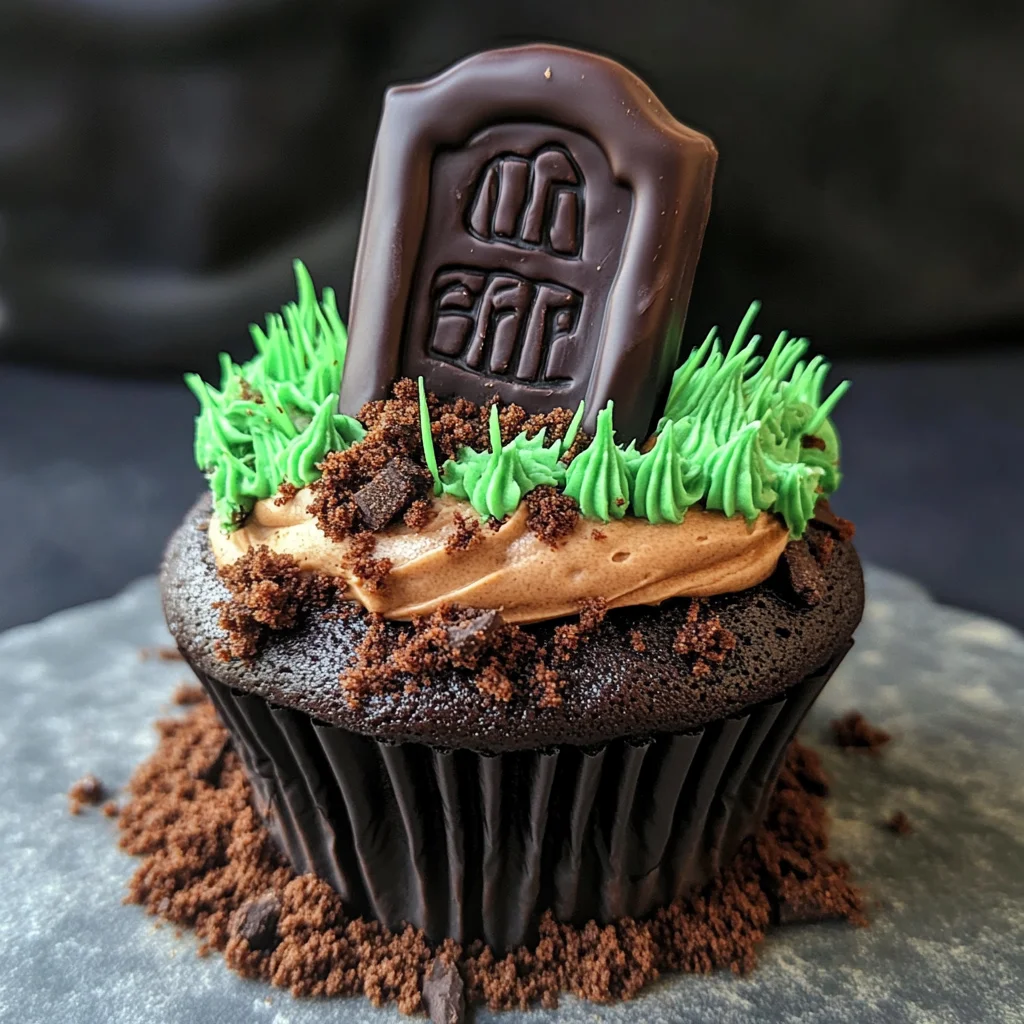
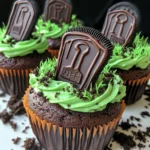
Halloween Graveyard Cupcakes
Chocolate cupcakes made to look like a graveyard, Halloween Graveyard Cupcakes are the perfect spooky treat for your Halloween gatherings. With a delicious Oreo cheesecake filling and topped with chocolate buttercream, Biscoff biscuit graves, and crushed Oreo soil, these cupcakes offer a fun and creative way to celebrate the season. Their unique appearance makes them a hit at parties, and their rich flavors will delight both kids and adults alike!
Why You’ll Love This Recipe
- Visually Stunning: These cupcakes are designed to look like a graveyard, making them an eye-catching centerpiece for any Halloween celebration.
- Deliciously Decadent: The combination of chocolate sponge, creamy Oreo filling, and rich buttercream creates a dessert that is not only fun but also utterly delicious.
- Easy to Customize: You can get creative with designs and decorations, making each cupcake uniquely yours.
- Perfect for Any Occasion: While they shine during Halloween, these cupcakes are great for birthdays or themed parties as well.
- Family-Friendly Fun: Involve the kids in decorating; they’ll love helping to create spooky treats!
Tools and Preparation
To make these Halloween Graveyard Cupcakes, you’ll need some essential tools to ensure everything goes smoothly.
Essential Tools and Equipment
- Cupcake tin
- Cupcake cases
- Piping bags
- Electric whisk or stand mixer
- Palette knife
- Cooling rack
Importance of Each Tool
- Cupcake tin: Essential for baking your cupcakes in uniform shapes.
- Piping bags: Make it easier to decorate with precision when adding buttercream or filling.
- Electric whisk or stand mixer: Saves time and ensures that your batter is mixed evenly for fluffy cupcakes.

Ingredients
To create these delightful Halloween Graveyard Cupcakes, gather the following ingredients:
For the Chocolate Cupcakes
- 12 Lotus biscoff biscuits
- 150 g Dark chocolate (melted)
- 30 g White chocolate (melted)
- 175 g Baking spread or butter (softened, unsalted)
- 175 g Caster sugar
- 3 Eggs (large)
- 2 tbsp Milk
- 150 g Self raising flour
- 25 g Cocoa powder
- 1/4 tsp Baking powder
For the Oreo Cheesecake Filling
- 115 g Full fat cream cheese
- 15 g Icing sugar
- 15 g Oreos (crushed)
- 1/8 tsp Vanilla extract
For the Chocolate Buttercream
- 100 g Butter (softened, unsalted)
- 165 g Icing sugar
- 35 g Cocoa powder
- 1-2 tsp Milk
For the Green Grass Buttercream
- 25 g Butter (softened, unsalted)
- 50 g Icing sugar
- 1/8 tsp Vanilla extract
- Green food colouring
For Decoration
- 35 g Oreos (crushed)
How to Make Halloween Graveyard Cupcakes
Step 1: Prepare the Biscuit Graves
Start by making the biscuit graves. Snap about a third off each Biscoff biscuit to create shorter gravestones. Melt the dark chocolate and dip each biscuit into it. Place on baking paper to set.
Step 2: Decorate the Biscuits
Once the dark chocolate has set, melt the white chocolate. Put it in a piping bag and pipe your desired designs onto the biscuits. Allow them to set again.
Step 3: Preheat Your Oven
Preheat your oven to 140C Fan/160C/325F/Gas Mark 3. Line a cupcake tin with cupcake cases.
Step 4: Make the Chocolate Sponge
In a mixing bowl, combine the baking spread and caster sugar using an electric whisk or stand mixer for about 5 minutes until light and fluffy. Add in the eggs and milk; whisk until well incorporated.
Step 5: Mix in Dry Ingredients
Gently fold in self-raising flour, cocoa powder, and baking powder until just combined.
Step 6: Bake the Cupcakes
Divide your mixture evenly among the cupcake cases. Bake for 25-30 minutes or until a skewer inserted into the center comes out clean. Allow them to cool completely on a cooling rack.
Step 7: Make Oreo Cheesecake Filling
While your cupcakes cool, prepare the Oreo cheesecake filling by mixing together cream cheese, icing sugar, vanilla extract until smooth. Stir in crushed Oreos for added flavor.
Step 8: Core Each Cupcake
Using a cupcake corer or knife, make a hole in each cupcake’s center.
Step 9: Fill with Cheesecake Mixture
Fill each hole with the Oreo cheesecake filling using either a spoon or small piping bag.
Step 10: Prepare Chocolate Buttercream
To make the chocolate buttercream, mix together softened butter, cocoa powder, icing sugar until smooth. Add milk gradually until you reach your desired consistency.
Step 11: Prepare Green Grass Buttercream
Mix together softened butter and icing sugar for green grass buttercream; add vanilla extract and green food coloring until smooth with an appealing shade.
Step 12: Decorate Your Cupcakes
Pipe chocolate buttercream onto each cooled cupcake using a round nozzle. Smooth out tops with either a palette knife or spoon.
Step 13: Add Biscuit Gravestones
Insert one decorated biscuit gravestone into each cupcake.
Step 14: Create Soil Decoration
Sprinkle crushed Oreos around each gravestone on top of cupcakes for an eerie soil effect.
Step 15: Pipe Grass Around Gravestones
Fill another piping bag with green grass buttercream fitted with a multi-opening nozzle. Pipe around biscuits to create grass texture or use small blobs created with spoons.
Final Touches
Store any leftovers in an airtight container at room temperature; enjoy within three days!
Indulge in these charming Halloween Graveyard Cupcakes that bring both fun and flavor to all your spooky celebrations!
How to Serve Halloween Graveyard Cupcakes
Halloween Graveyard Cupcakes are a delightful treat that can be served in various fun ways. Whether you’re hosting a spooky gathering or just want to enjoy them at home, here are some creative serving suggestions.
Creative Display Ideas
- Spooky Platter: Arrange the cupcakes on a black or orange platter for a festive look. Add gummy worms or plastic spiders for an extra creepy touch.
- Cupcake Stand: Use a tiered cupcake stand to elevate your display. This makes it visually appealing and easier for guests to grab their favorite treat.
- Themed Liners: Serve the cupcakes in Halloween-themed liners featuring ghosts, pumpkins, or bats to give them an extra festive flair.
Accompaniments
- Hot Chocolate: A warm cup of hot chocolate pairs perfectly with these cupcakes, adding to the cozy Halloween vibe.
- Ghostly Marshmallows: Serve alongside marshmallows decorated as ghosts for a fun and playful treat that complements the cupcakes well.
- Pumpkin Spice Latte: For adults, offer pumpkin spice lattes as a seasonal beverage that complements the chocolate flavors in the cupcakes.
How to Perfect Halloween Graveyard Cupcakes
To ensure your Halloween Graveyard Cupcakes turn out perfectly, follow these helpful tips.
- Use Room Temperature Ingredients: Starting with room temperature butter and eggs helps create a smoother batter, resulting in fluffier cupcakes.
- Don’t Overmix: Mix your batter just until combined. Overmixing can lead to denser cupcakes instead of light and airy ones.
- Bake Evenly: Rotate your cupcake tin halfway through baking for even cooking. This prevents any uneven rise or burnt edges.
- Cool Completely Before Decorating: Allow cupcakes to cool completely before adding frosting. This ensures that your decorations stay intact and look their best.
- Experiment with Colors: When making the green grass buttercream, feel free to mix different shades of green food coloring for a more realistic grass effect.
- Make Ahead of Time: You can prepare both the cupcake bases and fillings ahead of time. Store them properly until you’re ready to decorate for convenience.
Best Side Dishes for Halloween Graveyard Cupcakes
Pairing side dishes with your Halloween Graveyard Cupcakes can enhance your spooky dessert spread. Here are some great options.
- Pumpkin Soup: A warm, creamy pumpkin soup brings a seasonal flavor that complements the sweetness of the cupcakes.
- Spooky Cheese Platter: Include various cheeses, crackers, and some dried fruits arranged in a ghostly pattern for an elegant touch.
- Mummy Hot Dogs: Wrap hot dogs in crescent dough strips and bake until golden; they add a savory element that’s fun for kids.
- Witch’s Brew Punch: Create a refreshing punch with fruit juices and soda served in a clear bowl with floating eyeball candies for effect.
- Creepy Veggie Tray: Use carrots, celery, and bell peppers cut into spooky shapes; serve with hummus dressed as witches’ dip.
- Ghoulish Fruit Salad: Combine seasonal fruits like oranges and cranberries; use cookie cutters for fun shapes that fit the theme.
- Caramel Apples: These classic treats are both delicious and fitting for Halloween; consider decorating them with nuts or sprinkles.
- Ghostly Pizza Bites: Mini pizzas topped with cheese cut into ghost shapes create an appealing savory snack option alongside sweets.
Common Mistakes to Avoid
Making Halloween Graveyard Cupcakes can be fun, but there are common mistakes that can affect your results.
- Skipping the Cooling Time: Allowing your cupcakes to cool completely is vital. If you frost them while warm, the frosting will melt and slide off.
- Not Measuring Ingredients Accurately: Baking is a science. Use a kitchen scale or measuring cups to ensure precision for the best texture and flavor.
- Overmixing the Batter: Overmixing can lead to dense cupcakes. Mix just until the ingredients are combined for a light and fluffy texture.
- Ignoring Oven Temperature: Always preheat your oven before baking. Baking at an incorrect temperature can lead to uneven cooking or burnt edges.
- Forgetting Decoration Steps: The visual appeal makes these cupcakes special! Don’t forget the chocolate gravestones and Oreo soil for that spooky touch.
Storage & Reheating Instructions
Refrigerator Storage
- Store in an airtight container for up to 3 days in the fridge to maintain freshness.
Freezing Halloween Graveyard Cupcakes
- You can freeze un-frosted cupcakes for up to 2 months. Wrap each cupcake tightly in plastic wrap before placing them in a freezer-safe container.
Reheating Halloween Graveyard Cupcakes
- Oven: Preheat your oven to 150°C (300°F). Warm the cupcakes for about 10-15 minutes without frosting.
- Microwave: Heat individual cupcakes on a microwave-safe plate for about 10-15 seconds. Be careful not to overheat!
- Stovetop: This method isn’t recommended, as it may cause uneven heating or sogginess.
Frequently Asked Questions
Here are some common questions regarding Halloween Graveyard Cupcakes.
What are Halloween Graveyard Cupcakes?
Halloween Graveyard Cupcakes are chocolate cupcakes filled with Oreo cheesecake, decorated to resemble a spooky graveyard scene.
Can I customize the filling of my Halloween Graveyard Cupcakes?
Absolutely! Feel free to experiment with different fillings like vanilla buttercream or fruit preserves for a unique twist.
How do I make my own Oreo soil for decoration?
Simply crush Oreos into fine crumbs using a food processor or by placing them in a sealed bag and rolling over them with a rolling pin.
How long will these cupcakes last?
Halloween Graveyard Cupcakes last up to 3 days in the refrigerator when stored properly in an airtight container.
Can I make these cupcakes ahead of time?
Yes! You can bake and freeze the cupcakes un-frosted, then add decorations closer to serving time for freshness.
Final Thoughts
These Halloween Graveyard Cupcakes are perfect not just for Halloween but also for any festive gathering. Their spooky decoration and delicious flavors make them a hit among kids and adults alike. Feel free to customize the fillings and decorations according to your preferences!
Halloween Graveyard Cupcakes
Halloween Graveyard Cupcakes are the ultimate spooky treat that combines creativity and deliciousness. These fun chocolate cupcakes, filled with a creamy Oreo cheesecake mixture and adorned with rich chocolate buttercream, resemble a haunting graveyard scene. Topped with Biscoff biscuit gravestones and sprinkled with crushed Oreos for soil, they add an exciting touch to any Halloween gathering. Easy to make and customizable, these cupcakes will delight both kids and adults alike, making them perfect for parties or themed celebrations.
- Prep Time: 30 minutes
- Cook Time: 30 minutes
- Total Time: 1 hour
- Yield: Approximately 12 servings 1x
- Category: Dessert
- Method: Baking
- Cuisine: American
Ingredients
- 12 Lotus Biscoff biscuits
- 150 g Dark chocolate (melted)
- 30 g White chocolate (melted)
- 175 g Baking spread or butter (softened, unsalted)
- 175 g Caster sugar
- 3 Eggs (large)
- 2 tbsp Milk
- 150 g Self raising flour
- 25 g Cocoa powder
- 1/4 tsp Baking powder
- 115 g Full fat cream cheese
- 15 g Icing sugar
- 15 g Oreos (crushed)
- 1/8 tsp Vanilla extract
- 100 g Butter (softened, unsalted)
- 165 g Icing sugar
- 35 g Cocoa powder
- 1–2 tsp Milk
- 25 g Butter (softened, unsalted)
- 50 g Icing sugar
- 1/8 tsp Vanilla extract
- Green food colouring
- 35 g Oreos (crushed)
Instructions
- Preheat your oven to 140C Fan/160C/325F/Gas Mark 3 and line a cupcake tin with cases.
- Prepare the Biscoff biscuit graves by dipping broken pieces in melted dark chocolate and letting them set.
- Make the chocolate sponge by whisking softened baking spread and caster sugar until fluffy, then add eggs and milk.
- Fold in self-raising flour, cocoa powder, and baking powder before distributing the batter evenly into cupcake cases.
- Bake for 25-30 minutes until a skewer comes out clean; cool completely on a rack.
- For the Oreo cheesecake filling, mix cream cheese, icing sugar, vanilla extract, and crushed Oreos until smooth.
- Core cooled cupcakes and fill each with the Oreo mixture.
- Prepare chocolate buttercream by mixing softened butter, icing sugar, cocoa powder, and milk until smooth.
- Pipe onto cupcakes and decorate with biscuit graves and crushed Oreos.
Nutrition
- Serving Size: 1 cupcake (90g)
- Calories: 380
- Sugar: 35g
- Sodium: 150mg
- Fat: 20g
- Saturated Fat: 10g
- Unsaturated Fat: 8g
- Trans Fat: 0g
- Carbohydrates: 45g
- Fiber: 2g
- Protein: 5g
- Cholesterol: 50mg